


We continue with the tutorial series on making Native American branch fltues. You should have a splitted branch by now. You’ve made the marks so you know where the air and sound chambers will be placed. And you have prepared a simple workspace and mounted the branch (well, half of it for now) in the the vice. In this lesson, you will learn how to create the inner chambers with a chisel, some stamina and patience. This is a very important step, because the quality of the inner chambers of the flute have a direct effect upon the quality of the sound of the instrument.
There are many ways to carve the chambers – we have different tools and different techniques. If it happens that you find or learn a different way to carve the chambers, that’s all right. There are many different ways to create a flute, and I just share my own technique here.
Inner Chambers Diameter
How wide should the inner chambers be? How thick should be the walls of the flute? Basically, the walls should be anywhere from 5 mm to 8 mm – more than that may affect the resonance of the instrument in a negative way. And how wide the chambers should be, or in other words, what should be the diameter of the inner chambers once the two halves are laminated back together?
Straight away – between 18 mm and 22 mm. Here’s a thing – the diameter of the sound chamber of the flute, called bore, (recall anatomy of the Native American Flute) is related to its width – and vice versa. All of this is related to the flute’s fundamental note, or the key. For example:
- A Native American flute in the key of A should have a 300 mm sound chamber that is 18 mm wide in diameter.
- A flute in the key of F# should have a 370 mm sound chamber that is 20 mm wide in diameter.
As the key goes lower (the flute makes lower, deeper sound), the length of the chamber increases, and its diameter increases as well. This has to do with the physics of the sound. If we stick to these relating proportions, we make sure that our flute sounds good, is easy to tune, and each of its note has the same volume.
Of course, we can make flute that are much wider in inner diameter or smaller, for that matter, but when we do so, we may have troubles tuning the flute and achieving good sound and volume for each of the notes.
That’s why you should stick to these basic relations. Look at the table below:

First column shows the key, second kolumn is the bore diameter (inner chambers diameter), and the third column shows the sound chamber length.
So basically, if you want to make a flute that is in the key of G4, you need to make the sound chamber 20 mm wide and 340 mm long. Or, from the other side, if you have a branch that allows you to make a sound chamber no more than 280 mm, be prepared to make the bore 15 mm wide and get a flute in the key of B.
You can learn the basics of tuning the Native American Flute now – it should help you understand the relation between the length of the chambers and the notes played by the instrument.
BUT: again this is not rocket science – depending on the quality of the branch’s walls, your chiseling, wood structure etc, you may get slightly different results. Thus, don’t worry if you can’t achieve exact dimmensions, and always keep few mm in reserve as a backup.
All of this means that you may need to use smaller chisels than the ones you already have.
Making Cuts on the Edges
The first thing to do is to cut the edges of the chambers, meaning – incise them. We make a deep cuts on the edges of the chambers, so that when we carve the chambers with a larger chisel and greater strength, we won’t tear out the edges of the branch – this process will form the walls of the chambers.
From the previous tutorial you should have marks on your branch that show you the lengths of the chambers. Now mark their diameter – decide for the diameter of the flute based on the table above, and mark the diameter from the center of the branch, for example with a pencil.
Now, you can got to work. Basically, you make a simple deep cut with a straight chisel like on the photo below.
Making cuts on the edges of the chambers with a flat chisel.
And you do these cuts in both halves of the branch, on both the sound chamber and the air support chamber (slow air chamber). First, make the cuts parallel to the edges of the branch, and then make the cuts crosswise to the edges to form the inner wall between the sound chamber and the slow air chamber.
Thus, make sure you keep the wall between the two chambers intact in both halves of the branch, like on the photo below.
The wall between the sound and air chamber in a branch – sound mechanism is almost done in this photo.
Between the two chambers of the flute, a wall remains intact. Above it, we create the sound mechanism, but the wall itself must be air tight. Thanks to this construction, the air blew into the mouthpiece travels into a thin air channel under a flute’s block, and then it’s directed onto a splitting edge – and a sound is created.
Notice the “plug” – the red lines on left and right of this plug area mark the edges of the inner wall – make deep cuts there before chiseling to make sure you won’t tear out any piece of wood here.
After cutting the edges of the chambers, you can create the chambers themselves.
Carving the Inner Chambers
Finally, you can take the chisels and gouges and carve the inner chambers.There are four halves to carve – two in each piece of branch. It doesn’t matter in what order you create these chambers – just make them, and make sure they are a mirror reflection of each other as much as possible and the walls of the chambers are equal in size so that when you laminate the pieces together, they will fit nicely creating round and clean inner chambers.
Of course, sometimes it may not be possible to achieve total perfection – this depends on your skills, experience, techniques of carving and quality of tools you’re using. But even with small errors and imperfections, the flute should work.
When you work with round chisels and gouges, there are two types of moves you can use. First, you can carve the chambers by thrusting the chisel into the wood, then pulling the chisel back and thrusting it forward again, cutting away pieces of wood. Like below:
Back and forth, forth and back.
Or you can thrust the chisel into the wood, then move the chisel (or gouge) right and left (meaning, turning it slightly left and right), “tearing” the wood off and repeating the process until the chamber is done.
Thrust, and tear the wood off.
The first method makes smoother inner walls – the second method is faster. You can develop your own method of carving the chambers, or go on-line and search for better methods there. In either way, use your tools to carve the inner chambers in both halves of the branch.
Half of the sound chamber is now carved.
As you get closer to the wall between the chambers, make additional crossiwse deep cuts with deep chisel to make sure you won’t tear out any piece of wood from the wall – the wall must remain intact.
Don’t chisel too deep – because later on, you’re going to cut some amount of outer wood and sand it. There are tools to measure the depth of the “hole”, but if you don’t have any, here’s a tip. When I was just starting out and had little tools, I cut out a piece of bamboo, marked the middle of it on both sides, and then I was just placing it in the branch checking, if the black marks reach the top of the walls/edges. This way I knew if the carving reached the half of the chamber already or not.
Bamboo “tool” for checking the depth.
Sometimes, accidents happen and you may tear out a piece of side wall (edge) with your chisel. If this happens, react quickly – find the piece you teared out, put it back on the wall and hold it down with an duct tape. Later on, before laminating the halves together, you will remove the duct tape with great care, and use wood glue to glue the teared out piece back.
Sometimes, mistakes happen – when the edge of the branch (piece of the wall) is teared out, you can hold it down with a duct tape. You remove the duct tape with great care before laminating the branch back together.
This way, you make sure you won’t create nasty huge holes in the flute’s wall that would be very difficult to seal if you’re a beginner. And would affect the flute’s sound, too.
Sound chamber carved in both halves.
With time and patience, the chambers will be carved and ready.
- Do not rush things – work slowly and gently at first, get to learn the wood and the tools. Try to make the process of crafting the flute into meditation, or at least relaxation. It will not only give you some piece, but slow and gentle approach makes sure you won’t make any mistakes with the wood.
- From time to time, make breaks – allow the chisel/gouge to cool down, as hot tools blunt faster.
- Oh, and of course, always work with sharp tools :).
Carving is done – a lot of duct tape marks the wounds of teared edges.
Summary
With the inside bore prepared, we can now create the nest and the sound mechanism. Then we will sand down the chambers and glue the branch back together.
If you have more tips for carving the chambers of the Native American Flute, share them in the comments below – thanks!
Don't forget to become a fan on Facebook and subscribe to new posts via RSS or via email.
More from my site
 How to Make Brach Flute – Part 8: Finishes
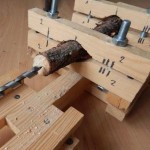 How to Build a Jig for Drilling Branch Flutes
- How to Make Branch Flute – Part 7: Sound and Tuning
- How to Make Branch Flute – Part 6: Sanding and Gluing
- How to Make Branch Flute – Part 5: Creating the Sound Mechanism
 How to Make Branch Flute – Part 3: Splitting the Branch and Preparing the Workspace
 via EMAIL