


Getting into a professional studio to record your own music may not be an available option for most people. Thus, most Native American Flute players will choose home recording when it comes to making their own music available for public. Recording the flute back at home is possible, and with a bit of effort, the effects will sound really good.
Today I will explain the absolute basics of recording the Native Flute at home – it’s a first step in releasing your own music album. This will be covered in another articles that will discuss mixing and mastering the music in computer software and actually releasing the music. Let’s begin!
This is definitely a type of article that discusses home recording studio that utilizes cheap gear and wicked practices – dear professionals, please don’t laugh ;).
In order to record the flute in home, you need a proper room and proper equipment, and once this is set, you need proper attitude and approach. Recording an instrument is very simple – get the mic, plug it into the computer and hit “record” with some software. But – this basic approach generates a lot of problems. Most people wish to record their Native American Flute in order to share their music with family or friends. Thus, the goal of most people is usually targetted at quality of the sound.
If you don’t know much about recording, you will record a very low quality music in most cases. So let’s expand the knowledge a bit. In order to record your own flute music, you need the following things:
- A microphone – that will be plugged into a recording device.
- A recording device – that will actually do the recording.
- And a proper room ;).
Let’s start with the last thing.
Recording Room
Before you even get the gear for recording, you need to set a recording room. It shouldn’t be too small nor too big – 12 square meters, give or take, is all right. Of course, the room must be as quiet as possible. Choose a room that is not polluted by outside noises like cars or backyard barbecue. Make sure no one disturbs you, the washing mashine is turned off and generally no one in the house makes any noises. And make sure it’s not an empty room, because empty walls give too much echo.
Next, you need to remember the things below – during recording, we need to minimize the amount of noise getting recorded – this will help greatly later on, during editing the recorded music.
- If you can get blankets, pillows or mattresses on the walls and windows, it’s awesome! They will reduce the amount of noise and sound bouncing back from the flat surfaces. Professional studios are equipped with expensive toys to remove high pitch sounds and low pitch sounds and stuff like that – back at home, we need to use what we have. If you have a small library, meaning a lot of books, they improve the recording quality of the room, too.
- Forget egg boxes – some articles tell you that egg boxes can improve the recording quality of the room, but in most cases, they don’t improve the quality of the recording room at all, they’re more like an urban legend for home recording…
- Keep the microphone cables away from the electricity – that means away from computers, batteries, power outlets in the walls, or actual power cables in the walls. Turn off the computer if you don’t use it and turn off the phone – radio waves from the phone or wifi are not a friend :).
- If you notice a constant buzz on the recording, try switching off the lights in the room – sometimes the sound of the lightbulbs will get recorded even if you can’t actually hear it yourself.
You can’t get rid of all the noise when recording at home – but after reducing the noise as best as possible, the the rest of the noise will be removed in the software. We keep the noise during recording at minimum, because even the software has its limits.
When the room is ready, you need a microphone to actually record the music.
Setting a Microphone
Actually, you can record your Native American Flute with a smartphone, or with computer’s built-in mic. But – the quality of such recording won’t be very good. That’s why you need to get a better mic.
There are many types of microphones available to customemers – you can really get a headache when you look at the possibilities. But most microphones are meant for professional use, that means: very specialized use. We use different stuff for guitars, different for flutes, different for vocals and different for drums etc.
For the purpose of home recording of Native American Flute, a dynamic microphone is the best choice. Better yet, a uni-directional dynamic microphone – such mic usually records only the sound that comes from the source in front of the mic; the sounds coming from the sides are usually ignored or at least recorded very silent. This also helps us keep the noise level very low.
- Explore Amazon’s microphone offer (aff) – make sure you find a uni-directional mic.
Usually, the price of the mic relates to the mic’s quality – that means good mics are more expensive than bad mics. The good news is that even getting a simple mic for $10 to $30 USD will be sufficient for the basic recording.
The microphone has to be plugged into some kind of recording hardware.
Recording Device
Most people will choose a basic computer – a mic can be plugged into the computer and we’re almost done! Unfortunatelly, the computer can also make a lot of noise:
- A working computer usually generates noise with its fans – they are great for cooling the hardware, but they make a lot of noise that gets recorded.
- Also, the fans generate vibrations – they can actually get recorded :). And we don’t want this to happen.
Thus, if you can get some good digital audio recorder that allows to record high quality audio, it’s just awesome! The biggest problem with home recording comes with the constant noise from the computer, but the digital recordeds do not generate noise almost all. By audio recorder I do not mean an expensive studio-quality gear :).
Personally, for the past few years I was using an Olympus recorder and it works great. It’s small, and can record sound with good quality. Check some Olympus recorders
(aff) on Amazon.
If you can’t get a digital audio recorder, then you should get the computer away from the room, for example place it behind the door, with the microphone cable going under the door into your recording room. This will minimize the noise coming from your computer.
These days, recording on smartphone’s or tablets is becoming popular, but since I never worked with these two things, I can’t say much about them. Basically, a tablet does not produce too much noise, so it may be a good way to record music – you may try that and do some experiements.
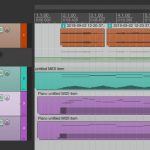
Now, if you’re using a computer to record the flute, you need some kind of recording software. I recommend downloading and installing Audacity – it’s a free and open source soft that will help you record your own music, and edit it later. Once installed, you open Audacity, plug in the mic and hit “record” button. The recording starts. Other operating systems will have different types of software used for recording, so you need to google them out if you never used them.
Setting the Mic
The room is ready, the hardware is ready and the software is ready, as well. The final thing is about proper setting of the mic’s positions as related to the flute itself.
In order to record the sound of the flute, and not the air coming out from the TSH, and to get all the notes at the same level of loudness, you need to place the mic next to the true sound hole, either on left or right side of the TSH.
Place the mic next to the true sound hole – not above it, but either on left or right side of the TSH, a bit above the nest flat level.
This setting works great – it records the sound without too much air hitting the mic, and all the notes played have the same loudness. Here’s what may happen if you place your mic in different place.
- If you place the mic in front of the TSH, above it, the mic will record the air speeding away from the true sound hole. This will make a nasty noise on the recording.
- If you place the mic above the finger holes, the fundamental note may not be loud enough on the recording, and you may also record tapping with your fingers by accident.
- If you place your mic in front of the bottom of the flute, where the sound chamber ends, most notes beside the fundamental note will not be loud enough.
With the proper setting, you can finally hit the record button and start playing.
- Once the mic is directed onto the TSH, try not making too many moves unless they’re an element of the artistic recording. For example, if you wish to make the sound fade out, you move away from the mic :). Unless this is the case, try to remain still when recording.
Now you know the basics of recording the Native American Flute back at home. Go ahead and do some recording on your own. In the next articles, I will explain how to edit your own music with computer software, and how to release the music to public, as well.
If you’re a more experienced flute player with experience in home recording, share your tips and suggestions regarding home recording in the comments below.
Don't forget to become a fan on Facebook and subscribe to new posts via RSS or via email.
More from my site
 How to Produce Native American Flute Music at Home
 How to Improvise on Native American Flute
 How to Play Jingle Bells on Native American Flute
 How to Play “Dakota Love Song” on Native American Flute
- How to Play “Everwood Theme” on Native American Flute
 How to Play “Halo Theme Choir” on Native American Flute
 via EMAIL