


By now, you have carved the inner chambers of your Native American flute and created the sound mechanism. The time has come to do the final sanding of the inner walls of the flute (optional), and glue the flute back together – obviously mandatory :).
In this tutorial, you will also test the flute for leaks, and make the very first sound. There won’t be much of difficult work. Instead, some patience is suggested. Let’s start!
Optional Sanding
If you have used your chisels carefully, the inner chambers of the flute should not be smooth enough, and no additional sanding should be required. But if you wish, remember that you need to progress with your sanding paper – start with low grain (80-100), then use 200 sanding paper, and finally maybe something around 300. Some people do not use low grain paper, and they sand the inner walls of the chambers just by using high grain sanding paper.
Anyway, make sure the walls of the chambers are as smooth as possible.
Gluing Your Native Flute
Now, before you start working with the glue, read on – you should learn all the tricks before doing the actual work, because the glue works fast and there won’t be time for any reading :).
The Tools You Need
First, you need a glue. Pick up a glue that is waterproof and water resistant. Many people from woodworking community recommend Titebond-2![]() (aff) or 3. Here in Poland, I can’t purchase this brand, but thousands of US-based woodworkers can’t be wrong, right? Anyway, waterproof glue is mandatory, because it can not fail due to moisture. After all, you breathe moisture into the flute whenever you play it.
(aff) or 3. Here in Poland, I can’t purchase this brand, but thousands of US-based woodworkers can’t be wrong, right? Anyway, waterproof glue is mandatory, because it can not fail due to moisture. After all, you breathe moisture into the flute whenever you play it.
Next, you need woodworking clamps![]() (aff). I usually use between 6 and 8 woodworking clamps for each flute I glue. Also, find a small piece of flat wood – you will need it to protect the sound mechanism when clamping.
(aff). I usually use between 6 and 8 woodworking clamps for each flute I glue. Also, find a small piece of flat wood – you will need it to protect the sound mechanism when clamping.
There’s no need for expensive clamps. Gluing the branch doesn’t require huge clamping pressure.
You need a small brush, too. You’re going to use it to spread the glue. Finally, grab some long stick, like a wooden dowel. Or a plastic and elastic one, if your branch is curved a lot. Use a duct tape to mount a piece of fabric on one of stick’s end and make sure the fabric stays there. When the flute is glued and clamped, you will have to put the stick inside the sound chamber to spread the glue that might have been pressed out into the chamber. When dry and hard, it will interfere with the sound’s resonance unless it’s spread out flat and/or wiped out.
Let’s Glue the Branch Flute
- Update (24.03.2016): a reader, Clayton, suggested an obvious tip: before glue, it’s a good idea to test-fit the two halves. It’s quite obvious now that I think about it, sorry for not mentioning it earlier. Just put the two halves together and see if they fit. Sometimes, when the branch is not dry enough, it may deform while carving, and the fit may not be perfect. Don’t worry, though, you can force the halves to fit each other to some degree. I did it in the past, and the flutes play well for this day.
Place the glue in some kind of small container, so you can pick up small amounts of glue with your brush. Prepare both halves of your branch flute. Now, use the brush to spread thin layer of glue on the walls of one half. Place the glue on the walls of the chambers, on the mouthpiece wall and the wall that separates the sound and air chamber from each other. Place a bit more glue on that separation wall between the chambers to make sure air won’t leak through.
I usually put no more than 1 mm layer of glue.
When the glue is spread, put the two halves of the branch back together and make sure they fit. It’s time to put clamps. Place a flat wooden block on the sound mechanism, and clamp it down (along with the branch). The wooden block here is used to spread the clamping pressure – without it, your clamp could imprint itself on the sound mechanism’s surface and damage it.
Remember that you want your nest to be as flat as possible. Otherwise, any leaks between the nest and the block will damage the quality of the sound your Native American flute produce.
Next, place the clamps on the front and back end of the branch, and then add clamps in the middle. Usually, we clamp the branch from top and bottom of the halves. Sometimes, we need to add the clamps on the sides, on the centers of the glue line. The reason is simple – the glue may cause the halves of the branch to slide. You may need to play around with the clamps to make sure the halves fit each other perfectly.

Branch flute glued back together and drying.
First, apply small clamping pressure and make sure everything fits. Then, you can increase the pressure on the clamps – but not too much, otherwise the branch may crack.
When the flute is glued back together and clamped, put your fabric stick inside and move it back and forth to spread the inside glue flat. Use another piece of fabric to wipe out the glue on the outside. Now, leave the flute to dry over night. Most wood glues bind the wood in an hour, but woodworkers recommend waiting for at least 20 hours just to make sure :).
If you do not have woodworking clamps, you may use rubber bands, or even duct tape to hold the branch’ pieces together. It won’t be the same strong clamping pressure, but it works. I used rubber bands and duct tape with my first branch flutes, and they work for this day.
Gluing the flute may result in a visible thin line between the two halves of the branch – it’s normal. To make sure is as little visible as possible, firmly clamp the flute when gluing. But quite often, this line cannot be hidden entirely.
Basic Block
While the flute is drying and hardening, you can prepare a small wooden block that will cover the air channel. You don’t need anything fancy right now – just a square piece of wood. You can cut if off the side of a small piece of bamboo. Or you can cut a small piece of round branch, make it long enough to cover the entire air channel with some extra mm of length. Then, split it in half, and run it back and forth on a flat sanding paper, to flatten the bottom surface of the wooden piece. Flatten the front wall of the piece, too – this will sit above the true sound hole.
This will be your test block.
I will explain how to make more complex blocks in another tutorial.
Testing for Leaks
After about 20 hours of drying, slowly take off the woodworking clamps from the flute.
Use a drill tool and a small drill bit of 8-14 mm in diameter to drill a small hole from the front of the flute into the air support chamber. This will be the mouthpiece.
Some people use small chisel to cut the mouthpiece channel into both halves of the branch before gluing it back together. I prefer the drill :).
Blow out any wood dust or small chips from the air chamber. The diameter of the mouthpiece channel between 8 and 14 mm gives us good air pressure to play a Native American Flute.
When the mouthpiece channel is ready, use your finger to cover the hole leading from the air chamber into the air channel of the nest. Cover it tightly, and blow the air into the air chamber through the mouthpiece channel. As you do so, open and cover the nest’s hole few times. You should feel pressure when the hole is covered. This means the air chamber is airtight.
Now, cover the true sound hole, and blow the air into the flute’s end – the hole at the end of the long sound chamber. Again, open and cover the true sound hole. With the hole covered, you should feel pressure when blowing the air into the sound chamber. This also means the sound chamber is airtight.
If these two tests prove the chambers are airtight, it’s a great news, and everything went fine. Otherwise, some troubleshotting is required.
If pressure isn’t present when you blow the air in, take duct tape and cover the glue line tightly, then repeat the process on both chambers with nest’s hole closed both. If the pressure is present, then there’s a leak in the glue line. You need to take more glue and paste it on the outside of the glue’ lines and wait for it to dry. This should deal with the leak.
If the air provides no pressure, it suggests the there’s a leak in the wall that separates the two chambers. Again, take some glue and place it on the wall – you can use a small flat piece of wood to put the glue on the separation wall through the true sound hole.
The First Sound
Finally, you can test if your flute makes the sound. Place a wooden block on the top of the nest, like on the photo below.
Simple block placement – the front wall of the block sits right above the true sound hole. You can see the air channel below the block.
Tie it down with a leather strap or a rubber band. Take a look on is area from a sideview – look against the light – there should be no light visible between the block and the surface of the nest. Everything must fit flat – if it doesn’t use sanding paper on a wooden block to flatten the surfaces of the nest and the block as much as possible. Just don’t push too far, or you may sand down the air channel :).
If the fit is good, blow the air into the air chamber through the mouthpiece – your flute should make the sound! It doesn’t matter if it’s clear or loud – if the sound is made, it’s already great! It means everything went fine during previous construction phases.
We will deal with the quality of the sound in the next tutorial. Then, we will move on to making finger holes and finishing the instrument.
Don't forget to become a fan on Facebook and subscribe to new posts via RSS or via email.
More from my site
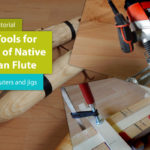 Power Tools for Making of Native American Flute – Part 1
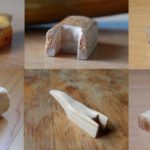 How to Build a Block (Bird, Fetish) for Your Native American Flute
 How to Make Brach Flute – Part 8: Finishes
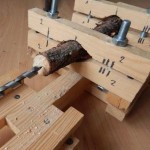 How to Build a Jig for Drilling Branch Flutes
- How to Make Branch Flute – Part 7: Sound and Tuning
- How to Make Branch Flute – Part 5: Creating the Sound Mechanism
 via EMAIL