By now you should know the basics of playing Native American flute. These basics allow you to play the flute already. But making flute music is not just about switching notes. It’s also about decorating the notes and the music you play. We decorate music with additional sound effects, like thrill, attacks, grace notes and so on. In this tutorial, you will learn how to decorate your flute music with simple techniques.
But also, it’s time for you to learn more about the way we write music – with notes. Standard musical notation isn’t difficult, it can be learned, really :). And using notes to write your music is a great way to speed up the process of composing music, while improving the way your brain works at the same time.
An Introduction to Nakai Tablature
From the series of tutorials on tuning Native American flute, you should be familiar with standard letters for notes, and the order of notes: C → D → E → F → G → A → B. These notes create an octave, and they all can be found on a piano keyboard. They also have their proper place on the staff, made of five lines.
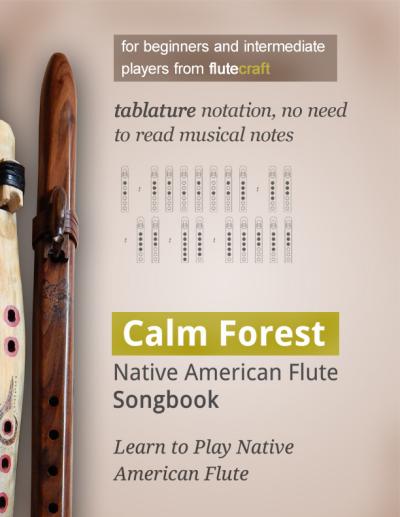
Each instrument plays a specific range of notes that can be placed on both a treble staff, and the bass staff. But to simplify things, Carlos R. Nakai came up with a different way to write notes. In so called Nakai’s notation or Nakai Tablature, each note on a staff represents a specific fingering on the flute. This way, you can play the melody from the sheet notes on any Native American flute, tuned to minor pentatonic scale.
Those of you who play other instruments may see how this simplifies things when the instruments come in so many various Keys.
Nakai notation is unique for Native American flute. Playing the songs written in this notation on other instruments, as standard music notation teaches, will not produce the same melody or notes.
Look at the image below:

The basic pentatonic scale – Nakai notation and finger tablature.
The top part is the fingering tablature. Black dots represent closed holes, white holes represent open holes. Try it now on your flute.
The bottom part of the above image is the staf. The left symbol is the treble clef. The four cross symbols are called “sharps” in music. Nakai decided for four sharps to be a symbol of his tablature method. In normal music notation, four sharps represent something completely different, but don’t worry about it now.
Below each fingering diagram, a dot is placed on the staff, between specific lines. This is unique in Nakai tablature, and universal for each pentatonic Native American flute with at least five finger holes. The image above basically shows how to play the dots on the staff :).
That’s it – these are the basics of Nakai tablature.
The Basic Exercise
With that knowledge, spend few hours playing the below notes. This will help you memorize the fingering and what flute’s note is represented by which black dot. Play the notes one way, then turn back and play it the other way. At first, play while looking at the fingering chart above, but as you progress with this exercise, try to play the notes below with fingering memorized.
The notes are note made into a melody, so it might not be interesting to your ears. It’s just a practice. You need to memorize the dots and be able to play notes just by looking at the staff, and not on fingering.

Nakai tablature – Native American flute fingering practice.
Practice for 15 minutes each day, and continue this exercise for a week or two. You may memorize the notes fast, but keep practicing just to embed all of this firmly into your brain :).
Basics of Music Theory and Notation
You now know that placing a note on different line of the staff equals a different pitch of the note, and different fingering. Notation allows us to mark different durations for each note. A note duration defines how long we need to play this note.
But before we can understand this, we need to learn about metrum and bars.

A clef, metrum and a bar with four quarter notes.
A metrum is defined by two digits on the right side of the clef. It usually says how many notes of which duration can be placed in the bar. A bar is a small piece of music. A song is made of many bars.
In the example above, we have 4/4 metrum, which is very popular. It basically says that within a bar – marked with two horizontal notes – we have four notes that are a 4th of a whole note, thus called quarter notes. The top digit tells us how many notes are within a single bar. The bottom digit tells us what kind of note the top digit talks :).
But notes add up. In 4/4 metrum, we can also put two half-notes, or two quarter notes and a single half-note or any other notes as long as their total length (duration) is no longer than 4 quarter notes. Simple enough, right?
If you write music for yourself, you don’t have to worry about that – later this article, I recommend a book that explains metrum better than I ever could. Right now, it’s good to be aware that metrum and bars exist, so you won’t be surprised seeing it on sheet notes.
Duration of Notes
Let’s get to the duration of the notes now.

From the left, a whole note and half note.
The single circle is a whole note. It is played for the duration of the entire bar. For now, let’s say you have a song of medium speed, in which the whole note should be played for 4 seconds. The second circle with the short vertical line is the half note. In our example is should be played for 2 seconds, because half note is always played for half the length of the whole note.

From the left: quarter note, eighth note, sixteenth note.
Quarter note should be played for 1 second, because it is played for quater the length of the whole note. Eight note should be played half the length of the quarter note. And sixteenth note should be played for half the length of the eighth note. It’s quite simple, isn’t it? This is how we define duration of the note in musical notation.
Now you can go to Google, type “metronome” into the search, and use the on-line metronome to define the speed of the song, using BPM, or beats per minute. Set it to 100 BPM, for example, and start to practice. Using the above examples, play the whole note for 4 beats, half note for 2 beats, quarter note for 1 beat and so on.

Pauses – or as professionals call them, rests.
Pauses, called rests, can be marked on the staff as well. On the image above, from the left we see whole rest, half rest, quarter rest, eighth rest and sixteenth rest. Just like in case of notes, whole rest is silent for four beats,
Music Theory for Dummies (aff) is a good book that will explain standard musical notation in great details. This is what I used to learn music. From this book, you will learn more about metrum, bars, beats and note duration.
Please remember that there are some small differences in the ways we write music for Native American flute.
Learning music notation and music theory is a great way to improve your Native American flute skills.
We can also increase the duration of the note in half with a dot.

Dot next to the note.
Placing a dot next to the note is a way to make is sound half-time longer. If you have a whole note played for 4 beats, a dot will make it sound for 6 beats. A half note should sound for 3 beats, and quarter note should sound for 1 and 1/2 of a beat.

Connecting to notes together.
Using a simple line between the lines like on the image above is a way to play these notes as one, without any pause between them. You may also see similar line that connects two notes together while still having “not connected” notes between. This is called legato line and it means you should play the notes within the legato without articulation that would separate them :).
I really need to make a video about this :).
With that knowledge in mind, we can proceed further.
Articulation, or How to Decorate Your Music
Articulation is a term that describes “special effects” an instrument is able to produce. A Native American flute is capable of various articulations, such as thrills, grace notes, fluttering or double-tonguing. I will explain these popular techniques now, and I will provide both the sound samples, as well as the ways we use to mark the articulations on the staff.
Flute Attacks
An attack is the term used to describe how the sound of the instrument starts. On Native Flute, we can achieve gentle attack by slowly beginning to blow into the mouthpiece. But when you say letter “k” when starting to play, this will create a stronger attack. Next, when you say letter “t” when starting to play, this will create a sharp, strong attack. Try it now :).
Grace Notes
One of the most popular decorative elements for Native American flute is the grace note. The grace note is a fast note that is “jumped” before or during another note.
It is played by quickly opening and closing the finger hole that is above the note being played. Usually, we open the second hole from the top (closer to the mouthpiece), but, for example, if you play the fundamental note of the flute, even opening the lowest finger hole and then closing it quickly, will do the trick.
Some people open just the single finger hole, while others open all the holes up to the “grace” one, for a fraction of a second. Depending on the flute, this will produce different sounds.

Grace Note
The photo above shows how we write a grace note on the staff. We write a small sixteenth note with a curved line connecting it to the main note.
Thrills
A thrill is another famous Native flute articulation.
We play it by rapidly opening and closing a note that is either above or below the note that is currently being played. Let’s say you have all your finger holes closed to play the fundamental note of the flute. To add a thrill, you can open and close the lowest finger hole rapidly. Try it now.

Thrill.
The left quarter note (notice that the vertical line can be draw down) has this symbol above it – this is how we write the thrill on the staff. The notes on the right is just a representation of how we play the thrill. As you can see, these are 32th notes :).
Flutter
A flutter is a tongue technique – while blowing the air into the mouthpiece on a single note, we try to say the letter “r” constantly, like “rrrrrrrrrr”.
This will create a unique sound.

Flutter.
We write the flutter on the staff by adding three lines on the note.
Double Tongue
A double tongue is also known as “tu-ku-tu-ku” technique, when we try to speak letters “t-k-t-k-t-k” (or tu-ku-tu-ku) while blowing the air into the flute.
It’s a nice, artistic decorative technique.

Double Tongue.
Two lines are added to the note to mark this technique.
Summary
Now you know how to mark the special effects on the staff, and hopefully, how to play them. With these simple techniques you can improve your Native flute skills. All you need is practice.
PS: Please let me know, in the comments below, if you’re having trouble understanding this tutorial, so I can improve it if necessary :).
Don't forget to become a fan on Facebook and subscribe to new posts via RSS or via email.


 via EMAIL